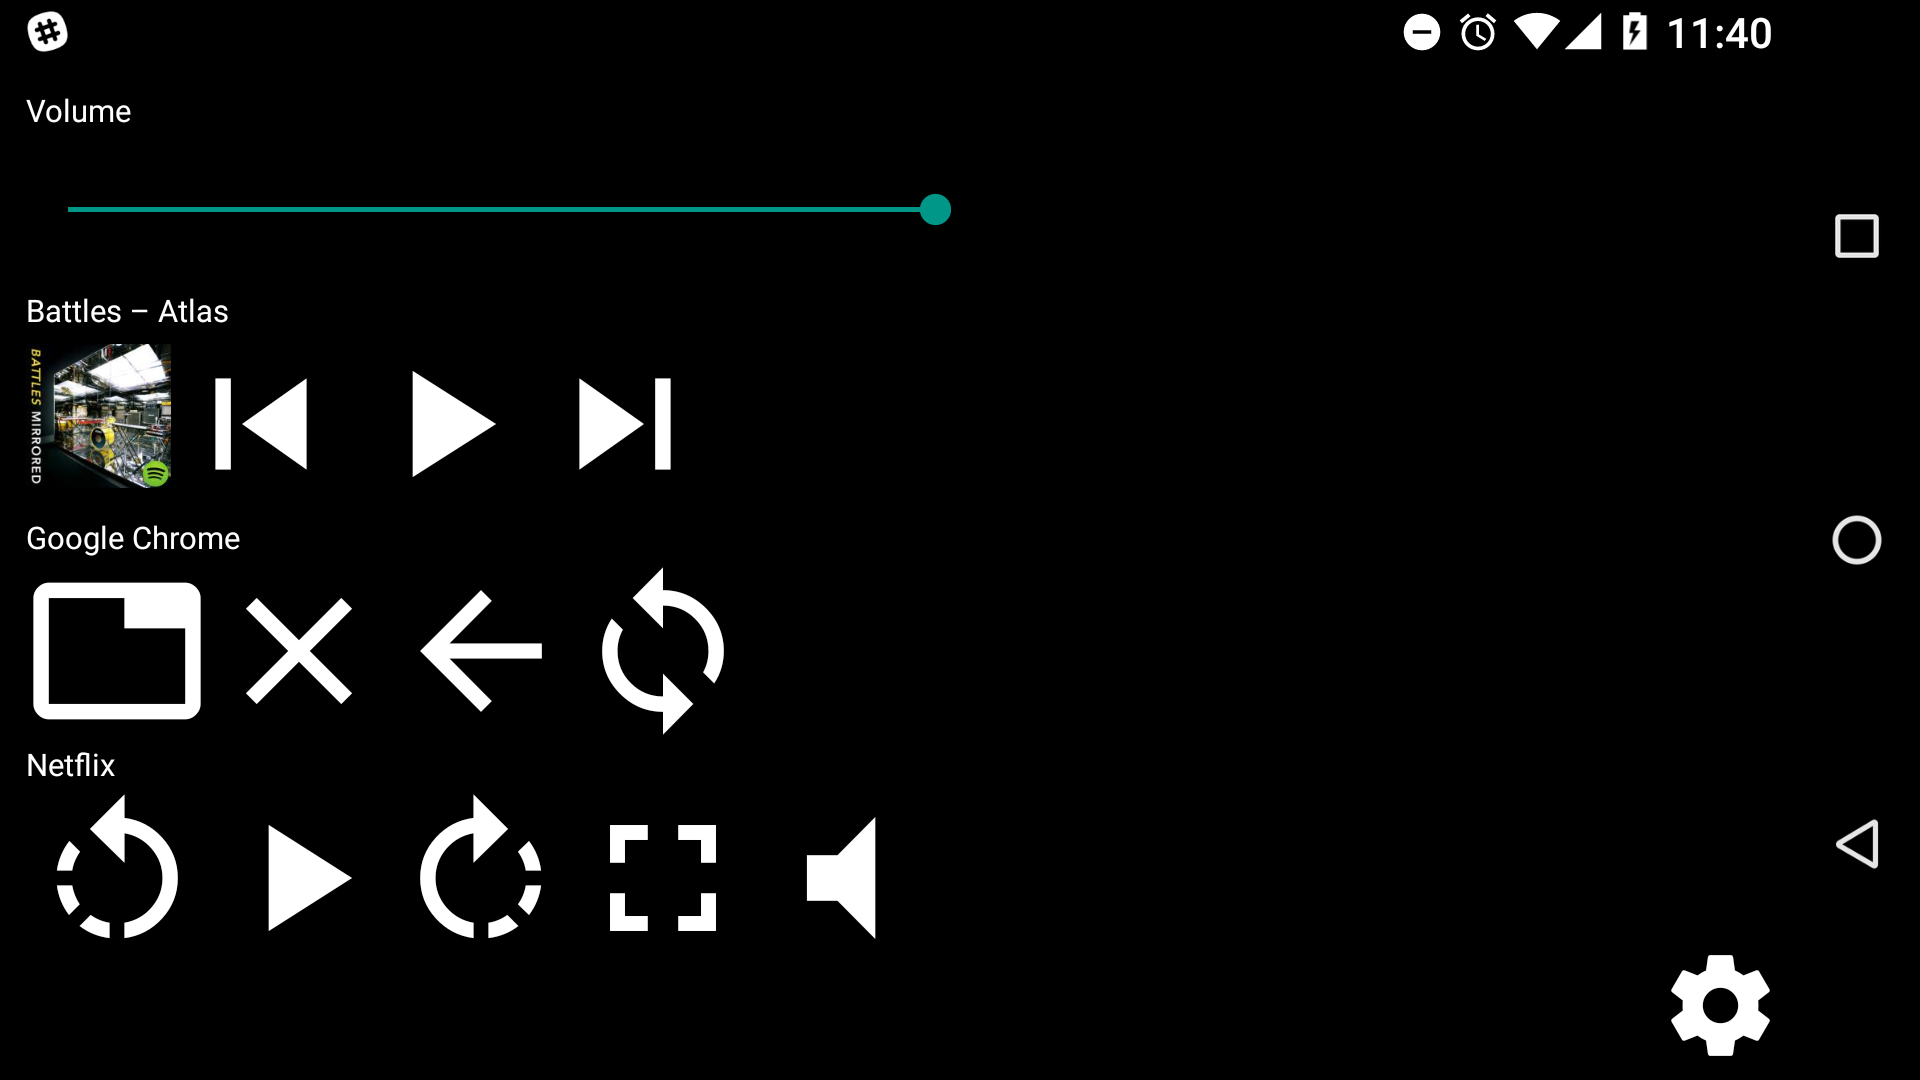
The idea of MacBook Touch Bar looks interesting, having custom controls for opened apps like a button for running tests when you use IDE or player controls when you watching movie. But it’s only available on new MacBook Pro. So I thought that would be nice to have something similar, but with phone instead of Touch Bar. Also I thought that it would be nice to make it easily extensible.
TLDR PhoneTouch, it’s very experimental, and by this time only linux supported (but you can easily add support of other OS). You can install and run it with:
npm install -g phone-touch
phone-touch
Also you need to install mobile app on Android from apk, or build it manually if you have an iOS device.
So how it works? If very simplified, app just watches for events on a desktop (like switching windows, etc) and remote-renders JSX components on a phone.
Desktop app
Let’s start with desktop app, because it’s more interesting.
Data sources
The first interesting thing in the desktop app are data sources.
Data sources are special functions (interval, callback) -> void, which calls
callback every interval ms with current value. So, for example, data source that
gets current window title, pid and executable path looks like:
import { exec } from 'child_process';

const getExecutable = (pid, callback) =>
  exec(`readlink -f /proc/${pid}/exe`, (error, stdout, stderr) =>
    callback(stdout.split('\n')[0])
  );

const getWindow = (callback) =>
  exec('xdotool getwindowfocus getwindowname getwindowpid',
    (error, stdout, stderr) => {
      const [title, pid, ..._] = stdout.split('\n');
      getExecutable(pid, (executable) => callback({title, pid, executable}));
    });

export default (interval, callback) => exec('xdotool -h', (error) => {
  if (error) {
    return;
  }

  setInterval(
    () => getWindow((window) => callback({window})),
    interval);
});
Every interval ms it gets current window by calling xdotool, than gets executable and calls
callback({window: {title, pid, executable}). It’s a bit not efficient, but it works.
Data sources results we use in another significant part – rules.
Rules
Rules are functions
({data-sources}) -> control?. Let’s look to a rule that shows controls for VLC:
import controls, { View, TouchableHighlight, Icon, Text } from '../controls';
import { sendKey } from '../utils';

const styles = {
  title: {color: '#ffffff', fontSize: 10},
  controlsHolder: {flexDirection: 'row'},
  control: {color: '#ffffff', fontSize: 60}
};

export default ({window}) => {
  if (window.title.search('VLC media player') === -1) {
    return;
  }

  return (
    <View key="vlc-group">
      <Text style={styles.title}
            key="vlc-title">VLC</Text>
      <View style={styles.controlsHolder}
            key="vlc-icons">
        <TouchableHighlight onPress={() => sendKey('ctrl+Left')}
                            key="vlc-rewind">
          <Icon style={styles.control} name="rotate-left"/>
        </TouchableHighlight>
        <TouchableHighlight onPress={() => sendKey('space')}
                            key="vlc-play">
          <Icon style={styles.control} name="play-arrow"/>
        </TouchableHighlight>
        <TouchableHighlight onPress={() => sendKey('ctrl+Right')}
                            key="vlc-fast-forward">
          <Icon style={styles.control} name="rotate-right"/>
        </TouchableHighlight>
        <TouchableHighlight onPress={() => sendKey('f')}
                            key="vlc-fullscreen">
          <Icon style={styles.control} name="fullscreen"/>
        </TouchableHighlight>
        <TouchableHighlight onPress={() => sendKey('m')}
                            key="vlc-mute">
          <Icon style={styles.control} name="volume-mute"/>
        </TouchableHighlight>
      </View>
    </View>
  );
};
You can notice that we use JSX with React Native components (and Icon from Vector Icons)
here even with callbacks. But how it works? First of all we use "pragma": "controls" for
transform-react-jsx plugin in .babelrc:
{
  "presets": ["es2015"],
  "plugins": [
    ["transform-react-jsx", {
      "pragma": "controls"
    }],
    "transform-object-rest-spread",
    "syntax-flow",
    "transform-flow-strip-types"
  ]
}
So code like:
<TouchableHighlight onPress={() => sendKey('m')}
                    key="vlc-mute">
  <Icon style={styles.control} name="volume-mute"/>
</TouchableHighlight>
We’ll be translated to:
controls(
  TouchableHighlight,
  {onPress: () => sendKey('m'), key='vlc-mute'},
  controls(Icon, {style: styles.control, name: 'volume-mute'}));
Where TouchableHighlight is a string, we defined all supported components as strings
in the desktop app, like:
export const View = 'View';
export const Image = 'Image';
export const Icon = 'Icon';
export const TouchableHighlight = 'TouchableHighlight';
export const Slider = 'Slider';
export const Text = 'Text';
export const Button = 'Button';
So controls function can serialize our control to:
{
  tag: 'TouchableHighlight',
  props: {
    onPress: {callbackId: '8c9084e97cb9412eaa0ea68cd658609b'},
    key='vlc-mute'
  },
  children: [{
    tag: 'Icon',
    props: {
      style: {color: '#ffffff', fontSize: 60},
      name: 'volume-mute'
    }
  }]
}
You can notice that we replaced function with {callbackId}, so we can serialize
controls to json and send them to mobile app. All callback stored in a special registry,
that we clean before controls update.
WebSocket server
The last part of the desktop app is a WebSocket server.
It sends new controls to clients when data source emits new data and listens to events from clients then calls appropriate callbacks from registry.
Mobile app
Mobile app is just a plain simple React Native + Redux + Redux Thunk app.
So the only interesting thing here is a rendering of controls, first of all we created object with all supported components:
import * as reactNativeComponents from 'react-native';
import Icon from 'react-native-vector-icons/MaterialIcons';

this._components = {Icon, ...reactNativeComponents};
And then we can recursively create components from controls received from the desktop
app with React.createElement:
_prepareChildren(children) {
  if (!children)
    return null;

  children = children.map(this._renderControl);

  if (children.length === 1) {
    return children[0];
  } else {
    return children;
  }
}

_renderControl(control) {
  if (isString(control))
    return control;

  const component = this._components[control.tag];
  if (!component) {
    console.warn('Unexpected component type:', control);
    return;
  }

  const props = this._prepareProps(control.props);
  const children = this._prepareChildren(control.children);

  return React.createElement(component, props, children);
}
As long as we propagate callback to the desktop app, we need to process all props and wrap callbacks in a special functions, which would emit action for sending callbacks to the desktop app:
_prepareArg(arg) {
  try {
    JSON.stringify(arg);
    return arg;
  } catch (e) {
    return '';
  }
}

_callback(callback) {
  return (...args) => this.props.callbackCalled({
    args: args.map(this._prepareArg),
    ...callback
  })
}

_prepareProps(props) {
  if (!props)
    return {};

  for (const key in props) {
    if (isObject(props[key]) && props[key].callbackId) {
      props[key] = this._callback(props[key]);
    }
  }

  return props;
}
And that’s all. Summarizing everything we got an app that acts in a similar to Touch Bar way, but simplified a lot.