VR with ClojureScript, three.js and Google Cardboard


cardboard

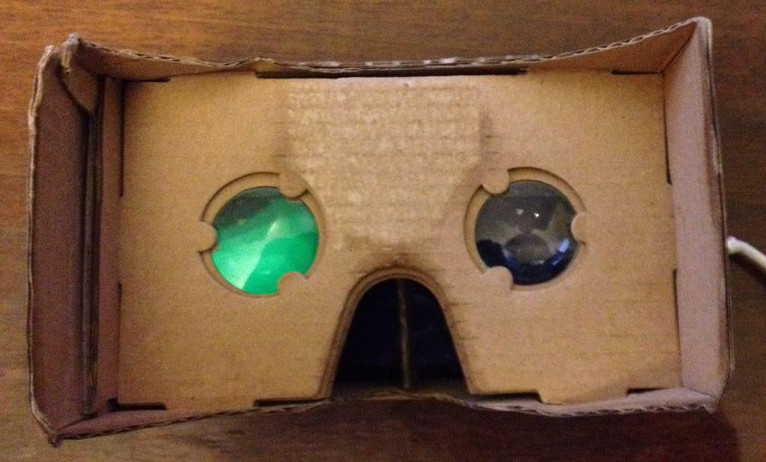
Not so long ago I read that John Carmack uses Lisp for VR, and also I found experiments for Cardboard with three.js and a good article about coding with three.js for Cardboard. I thought it will be good to combine this stuff and try to play with some poor man’s VR with cheap Cardboard and a browser. And use benefits of ClojureScript like figwheel with REPL and livecoding.

So for drawing I decided to use three.js with StereoEffect.js for drawing for both eyes and with DeviceOrientationControls.js for tracking head movements.

First of all we need to prepare a scene, a camera, a renderer for both eyes and a controls for tracking head movements:

(defn get-camera
  "Creates camera with desired aspect ratio."
  []
  (doto (js/THREE.PerspectiveCamera. 75 (/ (.-innerWidth js/window)
                                           (.-innerHeight js/window))
                                     0.1 1000)
    (.. -position (set 0 5 0))))

(defn get-canvas
  "Returns canvas that will be fullscreened after a click."
  []
  (let [canvas (.getElementById js/document "canvas")]
    (.addEventListener canvas "click" #(.webkitRequestFullscreen canvas))
    canvas))

(defn get-renderer
  "Creates renderer for both eyes."
  []
  (let [canvas (get-canvas)
        webgl (js/THREE.WebGLRenderer. #js {:canvas canvas})
        renderer (js/THREE.StereoEffect. webgl)]
    (.setSize renderer (.-innerWidth js/window) (.-innerHeight js/window))
    renderer))

(defn set-orientational-contorlls
  "Set in atom controlls that tracks device (and head) movements."
  [controlls camera e]
  (when (and (.-alpha e) (not @controlls))
    (let [ctrls (js/THREE.DeviceOrientationControls. camera true)]
      (.connect ctrls)
      (.update ctrls)
      (reset! controlls ctrls))))

(defn get-controlls
  "Returns atom with controlls."
  [camera]
  (let [controlls (atom)]
    (.addEventListener js/window "deviceorientation"
                       #(set-orientational-contorlls controlls camera %))
    controlls))

(def scene (js/THREE.Scene.))
(def camera (get-camera))
(def renderer (get-renderer))
(def controlls (get-controlls camera))

And then functions for rendering:

(defn do-render
  "Called on each render."
  [])

(defn render
  "Called on each render. This function not reloads on changes."
  []
  (js/requestAnimationFrame render)
  (when @controlls
    (.update @controlls))
  (.updateProjectionMatrix camera)
  (do-render)
  (.render renderer scene camera))

; Not reload render function when code changed:
(defonce render-started (atom false))
(when-not @render-started
  (render)
  (reset! render-started true))

When we need to do some actions (change color, rotate, etc) on each render — we need to change do-render.

Well, enough with boilerplate, look at some example — two rotating rectangles, you can see this example in the video. The code isn’t good looking, three.js api not so very friendly with ClojureScript, but it readable:

(defn create-rect
  "Creates a rect with given color and xyz."
  [color x y z]
  (js/THREE.Mesh. (js/THREE.BoxGeometry. x y z)
                  (js/THREE.MeshBasicMaterial. #js {:color color})))

; Creates white rect:
(def rect (create-rect "white" 1 1 1))
(.. rect -position (set 1 1 0))
(.add scene rect)

; Creates yellow rect:
(def other-rect (create-rect "yellow" 1 2 3))
(.. other-rect -position (set -0.5 -2 0))
(.add scene other-rect)

(defn do-render
  "Called on each render."
  []
  ; Rotates white rect:
  (set! (.. rect -rotation -x)
        (+ (.. rect -rotation -x) 0.01))
  (set! (.. rect -rotation -y)
        (+ (.. rect -rotation -y) 0.01))
  ; Rotates yellow rect:
  (set! (.. other-rect -rotation -x)
        (- (.. other-rect -rotation -x) 0.1))
  (set! (.. other-rect -rotation -y)
        (+ (.. other-rect -rotation -y) 0.1)))

Let’s see it in action, it’s not so fabulous without Cardboard, but livecoding makes it more interesting:

This way to work with Cardboard has a few problems: we can’t use the magnet trigger and we don’t have special lens distortion correction. And I guess next time I’ll try to use Cardboard SDK for Android with Clojure on Android.

Gist with the sources.

Chris Okasaki: Purely Functional Data Structures


book cover I was interested how common data structures were implemented in FP languages and decided to read Purely Functional Data Structures by Chris Okasaki. I can’t say that I understood all parts of this book, especially the last chapters. But reading and solving exercises from the book gave me some thoughts. And I guess I got more than enough answers to almost all my questions about functional data structures.

Also a good thing in this book — all examples are in SML and Haskell. And reading examples in SML is a more pleasure than reading them in C or Java, at least for me.

React-like tool for working with canvas


One of the greatest ideas in React is a shadow dom, it’s simple and fast. So I decided to implement something like shadow canvas and created the rerenderer — a special library that accumulates calls to shadow canvas methods, verifies that resulted script (or method set) changed and applies the script to a real canvas.

And the huge benefit of this way to work with a canvas — it’s easily to work not only with browser canvas, but with Android (partially implemented) and maybe even iOS.

Little note, if examples works slow on this page it’s because here’s too much animations for the single page. You can open it on a new page

So, first example – a rotating rectangle:

(defn rotating-rectangle
  [ctx {:keys [angle]} _]
  (r/call! ctx save)
  (r/call! ctx (clearRect 0 0 100 100))
  (r/set! (.. ctx -fillStyle) "red")
  (r/call! ctx (translate 35 35))
  (let [rangle (* angle (/ js/Math.PI 180))]
    (r/call! ctx (rotate rangle))
    (r/call! ctx (fillRect -25 -25 50 50)))
  (r/call! ctx restore))

(defn rotate-rectangle
  [state]
  (go-loop []
    (<! (timeout 5))
    (swap! state update-in [:angle]
           #(-> % inc (mod 360)))
    (recur)))

(defn scene-1
  [canvas]
  (let [state (atom {:angle 0})]
    (r/init! (browser canvas) rotating-rectangle state {})
    (rotate-rectangle state)))

Code is very low level (in comparison with the code for the same rectangle with svg), but it works pretty smooth:

(open on a new page)

You can notice that r/call! is very similar to .. macro, and r/set! works just set!, special macros are required for tracking interaction with the shadow canvas.

So, back to examples, let’s try to make the same rectangle moving, code was changed just a bit:

(defn rotating-and-moving-rectangle
  [ctx {:keys [angle x]} _]
  (r/call! ctx save)
  (r/call! ctx (clearRect 0 0 700 100))
  (r/set! (.. ctx -fillStyle) "red")
  (r/call! ctx (translate (+ x 25) 35))
  (let [rangle (* angle (/ js/Math.PI 180))]
    (r/call! ctx (rotate rangle))
    (r/call! ctx (fillRect -25 -25 50 50)))
  (r/call! ctx restore))

(defn rotate-and-move-rectangle
  [state]
  (go-loop []
    (<! (timeout 5))
    (swap! state update-in [:angle]
           #(-> % inc (mod 360)))
    (swap! state update-in [:x]
           #(-> % inc (mod 600)))
    (recur)))

(defn scene-2
  [canvas]
  (let [state (atom {:angle 0
                     :x 10})]
    (r/init! (browser canvas) rotating-and-moving-rectangle state {})
    (rotate-and-move-rectangle state)))

And it’s also works very smooth:

(open on a new page)

Then try to draw sprites, it’s very complicated with React and SVG, but very simple with this solution because we can use canvas drawImage method:

(defn mario
  [ctx atlas mario-state x y]
  (when mario-state
    (let [[sx sy] (get-in sprites mario-state)]
      (r/call! ctx (drawImage atlas sx sy 20 40 x y 40 80)))))

(defn all-marios
  [ctx {:keys [mario-0 mario-1 mario-2 mario-3 mario-4 mario-5]} {:keys [atlas]}]
  (r/call! ctx (clearRect 0 0 300 300))
  (mario ctx atlas mario-0 10 10)
  (mario ctx atlas mario-1 60 10)
  (mario ctx atlas mario-2 110 10)
  (mario ctx atlas mario-3 10 80)
  (mario ctx atlas mario-4 60 80)
  (mario ctx atlas mario-5 110 80))

(defn handle-mario
  [state state-key draw-state-key]
  (go-loop []
    (<! (timeout 100))
    (let [[mario-direction mario-state] (get @state state-key)
          [draw-direction draw-state] (get @state draw-state-key)
          next-draw-state (if (and (= mario-direction draw-direction)
                                   (= mario-state :run))
                            ; Changes drawing state (and sprite) when Mario running:
                            (condp = draw-state
                              :run :run-1
                              :run-1 :run-2
                              :run)
                            mario-state)]
      (swap! state assoc draw-state-key [mario-direction next-draw-state]))
    (recur)))

(defn scene-3
  [canvas]
  (go (let [state (atom {:mario-0-state [:right :stand]
                         :mario-1-state [:right :run]
                         :mario-2-state [:right :jump]
                         :mario-3-state [:left :stand]
                         :mario-4-state [:left :run]
                         :mario-5-state [:left :jump]})
            platform (browser canvas)
            options {:atlas (<! (r/image platform "mario.png"))}]
        (r/init! platform all-marios state options)
        (handle-mario state :mario-0-state :mario-0)
        (handle-mario state :mario-1-state :mario-1)
        (handle-mario state :mario-2-state :mario-2)
        (handle-mario state :mario-3-state :mario-3)
        (handle-mario state :mario-4-state :mario-4)
        (handle-mario state :mario-5-state :mario-5))))

Code is a bit redundant, but it shows how code for rendering and code for managing state can be easily separated. In action:

(open on a new page)

So let’s try something more complicated, a scene where the Mario goes to the right, jumps, goes to the left, jumps and repeats all actions:

(defn mario-scenario
  [state]
  (go-loop []
    ; Stand a half
    (swap! state assoc-in [:mario-state 1] :stand)
    (<! (timeout 500))
    ; Jump
    (swap! state assoc-in [:mario-state 1] :jump)
    (dotimes [_ 20]
      (<! (timeout 5))
      (swap! state update-in [:mario-y] dec))
    (dotimes [_ 20]
      (<! (timeout 5))
      (swap! state update-in [:mario-y] inc))
    ; Stand a half
    (swap! state assoc-in [:mario-state 1] :stand)
    (<! (timeout 500))
    ; Go right
    (swap! state assoc-in [:mario-state 1] :run)
    (dotimes [_ 300]
      (<! (timeout 5))
      (swap! state update-in [:mario-x] inc))
    ; Stand a second
    (swap! state assoc-in [:mario-state 1] :stand)
    (<! (timeout 500))
    (swap! state assoc-in [:mario-state 0] :left)
    (<! (timeout 500))
    ; Jump
    (swap! state assoc-in [:mario-state 1] :jump)
    (dotimes [_ 20]
      (<! (timeout 5))
      (swap! state update-in [:mario-y] dec))
    (dotimes [_ 20]
      (<! (timeout 5))
      (swap! state update-in [:mario-y] inc))
    ;Stand a half
    (swap! state assoc-in [:mario-state 1] :stand)
    (<! (timeout 500))
    ; Go back
    (swap! state assoc-in [:mario-state 1] :run)
    (dotimes [_ 300]
      (<! (timeout 5))
      (swap! state update-in [:mario-x] dec))
    ; Stand a half
    (swap! state assoc-in [:mario-state 0] :right)
    (<! (timeout 500))
    (recur)))

(defn moving-mario
  [ctx {:keys [mario-draw-state mario-x mario-y]} {:keys [atlas]}]
  (r/call! ctx (clearRect 0 0 500 300))
  (r/set! (.. ctx -fillStyle) "green")
  (r/call! ctx (fillRect 0 75 400 20))
  (mario ctx atlas mario-draw-state mario-x mario-y))

(defn scene-4
  [canvas]
  (go (let [state (atom {:mario-state [:right :stand]
                         :mario-x 20
                         :mario-y 15})
            platform (browser canvas)
            options {:atlas (<! (r/image platform "mario.png"))}]
        (r/init! platform moving-mario state options)
        (handle-mario state :mario-state :mario-draw-state)
        (mario-scenario state))))

There’s a bit too much code for managing the state of the Mario, but I guess it’s one of the simplest ways to write a scene like this:

(open on a new page)

Also rerenderer supports events (like clicks) and can play sounds, so as a bonus — a very simplified version of the Flappy Bird:

(open on a new page)

Flappy Bird code.

Rerenderer on github.

Gist with examples.

Add live reloading to Jekyll with Gulp and Browsersync


Live reloading is a very useful feature and it’s very popular in web development, but why don’t use it for writing blog articles and seeing changes in the real time?

I use Jekyll for this blog, and I already familiar with Gulp and Browsersync, so I decided to use them.

First of all, init a new package and install all dependencies:

npm init
sudo npm install -g gulp
npm install --save-dev gulp-shell lodash gulp browser-sync

And create a gulpfile.js with:

var gulp = require('gulp');
var shell = require('gulp-shell');
var browserSync = require('browser-sync').create();

// Task for building blog when something changed:
gulp.task('build', shell.task(['bundle exec jekyll serve']));
// If you don't use bundle:
// gulp.task('build', shell.task(['jekyll serve']));
// If you use  Windows Subsystem for Linux (thanks @SamuliAlajarvela):
// gulp.task('build', shell.task(['bundle exec jekyll serve --force_polling']));

// Task for serving blog with Browsersync
gulp.task('serve', function () {
    browserSync.init({server: {baseDir: '_site/'}});
    // Reloads page when some of the already built files changed:
    gulp.watch('_site/**/*.*').on('change', browserSync.reload);
});

gulp.task('default', ['build', 'serve']);

Then add created files and folders to Jekyll exclude, otherwise gulp will found more than one task with the same name. In _config.yml:

exclude: [node_modules, gulpfile.js]

And that’s all! For running it:

gulp

In action:

Testing ClojureScript code with cljs.test with phantomjs and figwheel


It isn’t easy to find how-to run tests written with cljs.test, and one of desired ways to run tests — run them from a terminal (or on a ci server). And it’s simple with phantomjs, first of all you need to configure cljsbuild. It config in project.clj should be like:

:cljsbuild {:builds {:test {:source-paths ["src" "test"]
                            :compiler {:output-to "resources/test/compiled.js"
                                       :optimizations :whitespace
                                       :pretty-print true}}}
            :test-commands {"test" ["phantomjs"
                                    ; Files will be crated later:
                                    "resources/test/test.js"
                                    "resources/test/test.html"]}}

And fill resources/test/test.js with something like:

var page = require('webpage').create();
var url = phantom.args[0];

page.onConsoleMessage = function (message) {
    console.log(message);
};

page.open(url, function (status) {
    page.evaluate(function(){
        // Use your namespace instead of `cljs-test-example`:
        cljs_test_example.test.run();
    });
    phantom.exit(0);
});

Then fill resources/test/test.html with:

<!DOCTYPE html>
<html>
<head>
    <script src="compiled.js"></script>
</head>
</html>

And create test.cljs in your tests root with your app namespace instead of cljs-test-example and with run function for running all tests:

(ns cljs-test-example.test
  (:require [cljs.test :refer-macros [run-all-tests]]))

(enable-console-print!)

(defn ^:export run
  []
  (run-all-tests #"cljs-test-example.*-test"))

And now you can run your tests:

➜ lein cljsbuild test
Compiling ClojureScript.
Running ClojureScript test: test

Testing cljs-test-example.core-test

Ran 1 tests containing 1 assertions.
0 failures, 0 errors.

Another popular approach is to run tests when source code changed, it can be easily done with figwheel. You just need to configure figwheel to run tests when js loaded:

:cljsbuild {:builds {:main {:source-paths ["src" "test"]
                            ; Runs tests on every change:
                            :figwheel {:on-jsload "cljs-test-example.test/run"}
                            :compiler {:output-to "resources/public/compiled/main.js"
                                       :output-dir "resources/public/compiled"
                                       :asset-path "/compiled"
                                       :main "cljs-test-example.core"
                                       :source-map true
                                       :optimizations :none
                                       :pretty-print false}}}}

Add ^:figwheel-always metadata to the namespace with function for running tests, like:

(ns ^:figwheel-always cljs-test-example.test
  (:require [cljs.test :refer-macros [run-all-tests]]))

And add ^:figwheel-load to all namespaces with tests, like:

(ns ^:figwheel-load cljs-test-example.core-test
  (:require [cljs.test :refer-macros [deftest is]]
            [cljs-test-example.core :refer [do-something-x-y]]))

Then you can see tests results in your browser console, like:

Example project with cljs.test.

Little comparison of ways to use Clojure on Android


Not so long ago I started trying to use Clojure for developing for Android, mostly for graphic. As a test project to run I decided to use Bocko with a few bundled examples.

First of all I started with ClojureScript, maybe because of expectations of React Native on Android. I made a port which works from a WebView, calls proxy object and draws on a SurfaceView, because of that it’s possible to use figwheel for livecoding. But this method requires a bit of java code, but works fast (painting appears after some delay, but it’s because port isn’t optimised, all other variants uses the same algorithm):


Then I tried just Clojure with Clojure on Android, it’s a bit slower and has a long startup time. Also not works with core.async and original Bocko, because of lack of support of *.cljc. But not requires java code. In action:


Also Clojure on Android affords Project Skummet that drastically improves startup time and performance, but nothing changes with the problem with third party libs. Looks better:


Source of the ClojureScript version.

Source of the Clojure version (configured to work with Skummet).

Livecoding for Android with ClojureScript and Bocko


Not so long ago I found a cool library that allows us to draw simple graphic — Bocko. It works in browsers, on desktop and on iOS, but not on Android. So I decided to port it. Not by putting it in a WebView, I wanted a native app. Not by using Clojure on Android, it was a bit laggy when I tried it, it was an year or more ago, so I guess I should try it again. But by running ClojureScript inside a WebView and using a proxy object for drawing on a native canvas.

And one of the greatest advantages of this method – I can use figwheel just by changing url that opens in the WebView. First of all, it gives use REPL. And code, evaluated in the REPL, executes on Android device and changes painting on the screen:

scale

Also, figwheel automatically pushes changes in the code to the device, so when the code changes, painting on the screen changes too:

scale

And it’s simple to configure. First of all you need to changed method getUrl from BockoAndroid/app/src/main/java/com/nvbn/bockoandroid/BockoView.java to something like this, but with your ip address:

String getUrl() {
    return "http://192.168.0.107:3449/";
}

And write your ip address in :websocket-host in :figwheel section of :cljsbuild build configuration, so your project.clj will be like:

(defproject bocko-example "0.1.0-SNAPSHOT"
            :license {:name "Eclipse Public License"
                      :url "http://www.eclipse.org/legal/epl-v10.html"}
            :dependencies [[org.clojure/clojure "1.7.0-beta3"]
                           [org.clojure/clojurescript "0.0-3269"]
                           [bocko "0.3.0"]
                           [bocko-android "0.1.3-1"]]
            :plugins [[lein-cljsbuild "1.0.6"]
                      [lein-figwheel "0.3.3"]]
            :cljsbuild {:builds {:main {:source-paths ["src"]
                                        :figwheel {:websocket-host "192.168.0.107"}
                                        :compiler {:output-to "resources/public/compiled/main.js"
                                                   :output-dir "resources/public/compiled"
                                                   :asset-path "/compiled"
                                                   :main bocko-example.core
                                                   :source-map true
                                                   :optimizations :none
                                                   :pretty-print false}}}})

Bocko on Android github.

Reactive animation with SVG, ClojureScript and Om


Animation in a browser is a very complicated subject, it requires tons of timers, hard-to-track imperative stuff like drawRect. But can’t it be simplified to just drawing specific items in some places at certain times? Sounds complicated too, but it’s not. In SVG it’s just a changing of attributes like x, y, width and etc, or inserting DOM nodes with desired attributes. Sounds like React will be useful here, I’ll use not just React, but Om with om-tools (for better syntax).

For example, what if we want to draw a rotating red rectangle? Looks like we just need to change transform attribute of the rectangle every n milliseconds:

(defcomponent rotated-rect
  [{:keys [x y width height]} owner]
  (init-state [_] {:angle 0})
  (will-mount [_]
    (go-loop []
      ; Increases angle every 10 milliseconds:
      (om/update-state! owner :angle #(-> % inc (mod 360)))
      (<! (timeout 10))
      (recur)))
  (render-state [_ {:keys [angle]}]
    (let [center-x (+ x (/ width 2))
          center-y (+ y (/ height 2))]
      (dom/rect {:width width
                 :height height
                 :fill "red"
                 ; Rotates rectangle for `angle`:
                 :transform (str "rotate(" angle ", " center-x ", " center-y ")")
                 :x x
                 :y y}))))

(defcomponent scene-1
  [_ _]
  (render [_]
    (dom/svg {:width "100%" :height "100%"}
             (om/build rotated-rect {:x 50
                                     :y 50
                                     :width 100
                                     :height 100}))))

Isn’t it simple? And it works:

What if we want to move the rectangle across the scene? We can do it without changing rotated-rect:

(defcomponent scene-2
  [_ owner]
  (init-state [_] {:x 0})
  (will-mount [_]
    (go-loop []
      ; Increases x every 10 milliseconds:
      (om/update-state! owner :x #(-> % inc (mod 600)))
      (<! (timeout 10))
      (recur)))
  (render-state [_ {:keys [x]}]
    (dom/svg {:width "100%" :height "100%"}
             (om/build rotated-rect {:x x
                                     :y 50
                                     :width 100
                                     :height 100}))))

And the rectangle continued to rotate:

Sprites are very useful for animation, and in SVG it can be used with combination of pattern and image tags, but both of them doesn’t supported by Om (because not supported by React). But we can use ugly dangerouslySetInnerHTML attribute:

(defcomponent sprite
  [{:keys [x y img-width img-height scale sprite-x sprite-y sprite-w sprite-h href]} _]
  (render-state [_ _]
    (let [id (gensym)]
      (dom/g (dom/defs {:dangerouslySetInnerHTML {:__html (str "
            <pattern id='" id "'
                     patternUnits='userSpaceOnUse'
                     x='" x "'
                     y='" y "'
                     width='" sprite-w "'
                     height='" sprite-h "'>
              <image x='" (- 0 sprite-x) "'
                     y='" (- 0 sprite-y) "'
                     xlink:href='" href "'
                     width='" img-width "'
                     height='" img-height "'
                     transform='scale(" scale ")' />
            </pattern>")}})
             (dom/rect {:x x :y y :width sprite-w :height sprite-h
                        :fill (str "url(#" id ")")})))))

(defcomponent scene-3
  [_ _]
  (render [_]
    (dom/svg {:width "100%" :height "100%"}
             (om/build sprite {:img-width 406
                               :img-height 1507
                               :scale 2
                               :sprite-w 40
                               :sprite-h 80
                               :href "mario.png"
                               :sprite-x 214
                               :sprite-y 240}))))

And render Mario from the sprite:

So we have the sprite with a few poses of Mario, why not create a component for him? Assume that he can stand, run and jump to left and right, and running is an animation of changing three images. So Mario component should render himself depending on state and direction:

(defn mario-sprite
  [& opts]
  (om/build sprite (assoc (apply hash-map opts)
                     :img-width 406
                     :img-height 1507
                     :scale 2
                     :sprite-w 40
                     :sprite-h 80
                     :href "mario.png")))

(def sprites
  {:right {:run [328 320]
           :run-1 [354 320]
           :run-2 [378 320]
           :jump [335 240]
           :stand [214 240]}
   :left {:run [60 320]
          :run-1 [34 320]
          :run-2 [8 320]
          :jump [54 240]
          :stand [174 240]}})

(defcomponent mario
  [{:keys [x y]} owner]
  (init-state [_] {:state :stand
                   :direction :left})
  (will-mount [_]
    (go-loop []
      (let [state (om/get-props owner :state)
            direction (om/get-props owner :direction)
            drawing-state (om/get-state owner :state)
            drawing-direction (om/get-state owner :direction)
            next-state (if (and (= direction drawing-direction) (= state :run))
                         ; Changes drawing state (and sprite) when Mario running:
                         (condp = drawing-state
                           :run :run-1
                           :run-1 :run-2
                           :run)
                         state)]
        (om/set-state! owner :state next-state)
        (om/set-state! owner :direction direction))
      (<! (timeout 100))
      (recur)))
  (render-state [_ {:keys [state direction]}]
    (let [[sx sy] (get-in sprites [direction state])]
      (mario-sprite :x x
                    :y y
                    :sprite-x sx
                    :sprite-y sy))))

(defcomponent scene-4
  [_ _]
  (render [_]
    (dom/svg {:width "100%" :height "100%"}
             (om/build mario {:x 10 :y 10 :state :stand :direction :right})
             (om/build mario {:x 60 :y 10 :state :run :direction :right})
             (om/build mario {:x 110 :y 10 :state :jump :direction :right})
             (om/build mario {:x 10 :y 100 :state :stand :direction :left})
             (om/build mario {:x 60 :y 100 :state :run :direction :left})
             (om/build mario {:x 110 :y 100 :state :jump :direction :left}))))

It works and now we can see Mario rendered with all available states and directions:

So let’s write a simple animation with Mario: he jumps, goes to the right end, jumps, goes to the left end and repeats. With core.async it’s very simple to write “scenario” for this:

(defcomponent scene-5
  [_ owner]
  (init-state [_] {:mario-state :stand
                   :mario-x 20
                   :mario-y 10
                   :mario-direction :right})
  (will-mount [_]
    (go-loop []
      ; Stand a half
      (om/set-state! owner :mario-state :stand)
      (<! (timeout 500))
      ; Jump
      (om/set-state! owner :mario-state :jump)
      (dotimes [_ 20]
        (<! (timeout 5))
        (om/update-state! owner :mario-y dec))
      (dotimes [_ 20]
        (<! (timeout 5))
        (om/update-state! owner :mario-y inc))
      ; Stand a half
      (om/set-state! owner :mario-state :stand)
      (<! (timeout 500))
      ; Go right
      (om/set-state! owner :mario-state :run)
      (dotimes [_ 300]
        (<! (timeout 5))
        (om/update-state! owner :mario-x inc))
      ; Stand a second
      (om/set-state! owner :mario-state :stand)
      (<! (timeout 500))
      (om/set-state! owner :mario-direction :left)
      (<! (timeout 500))
      ; Jump
      (om/set-state! owner :mario-state :jump)
      (dotimes [_ 20]
        (<! (timeout 5))
        (om/update-state! owner :mario-y dec))
      (dotimes [_ 20]
        (<! (timeout 5))
        (om/update-state! owner :mario-y inc))
      ;Stand a half
      (om/set-state! owner :mario-state :stand)
      (<! (timeout 500))
      ; Go back
      (om/set-state! owner :mario-state :run)
      (dotimes [_ 300]
        (<! (timeout 5))
        (om/update-state! owner :mario-x dec))
      ; Stand a half
      (om/set-state! owner :mario-direction :right)
      (<! (timeout 500))
      (recur)))
  (render-state [_ {:keys [mario-state mario-direction mario-x mario-y]}]
    (dom/svg {:width "100%" :height "100%"}
             (om/build mario {:x mario-x
                              :y mario-y
                              :state mario-state
                              :direction mario-direction})
             (dom/rect {:fill "green"
                        :x 0
                        :y 70
                        :width 400
                        :height 20}))))

It’s simple and it works:

Looks cool, but it isn’t. Animation is laggy and isn’t smooth, and it glitches. So I guess it isn’t an appropriate solution for an SVG animation. And only working solution is, I guess – <animate> and <animateTransform>, further I’ll try to make them work with Om, dangerouslySetInnerHTML isn’t enough for them.

Gist with the source code.

Sam Newman: Building Microservices


book cover Few days ago I finished reading Building Microservices by Sam Newman and I can say is the one of the greatest book I read in the last year. It describes rationale of microservices, technical problems and possible solutions, view to the theme from management side and a lot more. The book describes development of modern distributed system from all aspects, but not goes deep in details.

Definitely worth reading!

Three months in Budva, Montenegro


Work from beach sucks!

The latest three month I was living In Budva, Montenegro. It’s a small town between the sea and the mountains with great climate (in comparison with weather in Saint-Petersburg, Russia).

I was working remotely and lived by a tourist visa (maybe not a visa, just a stamp in a passport), because of that I was required to leave the country once a month (probably origin country depend). It’s a bit troublesome, but I visited Istanbul (Turkey) and Belgrade (Serbia), which is nice.

Also in Montenegro It’s obligatory to receive the document called “beli karton”. For that you need to pay around €25 (for a month) in a bank, and receive this document in tourists office.

As a landline internet only ADSL available with 7Mbps/768kbps (works more like 3-4Mbps), which is enough for most of tasks, but pulling docker images and pushing code to GAE was a pain. Costs around €25.

For a mobile internet I used packs for 1GB for €3 for 15 days, I don’t remember the speed, but according to the indicator on the phone it was HSDPA.

About prices:

  • one-bedroom apartments for a month if you rent for three – €200;
  • utilities (including internet and mobile phone) – €50-70;
  • food for one person for a week, meat/fish/seafood everyday – €30-50;
  • can of beer – €1-1.25;
  • bottle of local wine – €4;
  • burger/kebab – €0.8-1.2.

Also I tried to work from a beach, and with my laptop screen it wasn’t possible.