Recently I wanted to read something
about Graphite and monitoring in general, as I sometimes need to interact with it.
And I’ve found Monitoring with Graphite by Jason Dixon
and read it. It’s kind of a nice book with history, explanation of the architecture and use cases
of Graphite. It’s not that long and easy to read.
Can contain a bit less information of Graphite’s ugly interface though.
Around a month ago I’ve started working with Hadoop,
so I decided that I need to read something about it, and chose
Hadoop: The Definitive Guide by Tom White
that I already had from the Humble Book Bundle.
The book contains a lot of information about Hadoop internals and related stack with use cases
and examples. And I guess there are too much huge code samples with all boilerplate. And too many
pages are like some option – description, there’s already the documentation for things like that.
But overall the book is good. After reading it I feel way more confident with Hadoop.
MacBook TouchBar is almost useless, so I decided to put Christmas lights on it.
And apparently it was very easy. Electron has very simple API for TouchBar.
As Christmas lights should have distinctive colors, I hardcoded just seven of them:
And as only one colorable element in electron API is TouchBarButton, and there’s space for only
eight buttons on the TouchBar, I generated them with defined colors:
The last part is the logic of the lights. I made it very simple, every five milliseconds
I’m increasing tick and updating colors of buttons with number have the same modulo
of three as the tick:
KissCartoon is a nice place to watch cartoons,
but it’s not usable with Chromecast at all. It doesn’t play next episode automatically.
But it’s very easy to fix with a small Chrome extension. TLDR:Castable KissCartoon.
So how it works?
When you open a page with a player, it’s starting to listen for an ended event:
When the event emits, it puts current URL in localStorage and clicks next button.
After the next page is loaded, it ensures that the previous page is the page with
the previous episode:
If the extension is sure that we on the page with the next episode, it toggles fullscreen.
But we can’t actually toggle fullscreen, it’s not possible to call requestFullscreen because
it can be called only from a callback initiated by a user event. So the extension uses a little
hack. It dims other elements on the page and expands the player by setting position: fixed.
And it works well with Chromecast, the player fills the whole TV.
Recently, while waiting for a long-running script to finish, I thought that it would be nice
to have some sort of loader with aging emojis. TLDR:we-are-waiting.
The “life” of an emoji is simple:
👶🏿 → 👧🏿 → 👩🏿 → 👱🏿♀️ → 👩🏿⚕️ → 👵🏿
It contains aging from a baby to grown-up person, one profession, and oldness.
And as we have four colors, two genders, five ages, and 22 professions. We can have a
great variety of lives. So as the first thing to do I decided to generate all those variants.
Initially, I was planning to implement everything in Go, but it’s not possible to use
emojis in Go code, only codepoints. Because of that, I decided to write a little Python script,
that will generate Go code with all variants with codepoints instead of emojis.
For that I just copied lines with emojis from getemoji.com and put them in lists:
As emojis have a strange order, generation of all variants is a bit tricky, but it’s easier than rearranging them
in code because my editor doesn’t work quite well with emojis:
And after that it’s very easy to generate Go package with all possible variants:
code=b'package variants\n\nvar All = [][]string{\n'forvariantinget_variants():code+=b'\t{\n'foremojiinget_life(*variant):code+=b'\t\t"'+emoji.encode('unicode-escape')+b'",\n'code+=b'\t},\n'code+=b'}\n'withopen('variants/variants.go','wb')asf:f.write(code)
So we’ll have something like this in variants/variants.go:
The logic of the loader isn’t that interesting, although I want to highlight some moments. At the high level
we just read lines from a pipe, if there’s no new line arrived before tick seconds, we update our emojis:
As I sometimes use Perl, I decided
to read something about it. And Higher-Order Perl by Mark Jason Dominus
was looking interesting. The book is really nice, it shows
that Perl can be kind of a functional programming language and that
it’s possible to implement almost every feature from other languages in Perl.
Also, after reading the book, I think there’s copious amount
of ways to shot yourself in the leg in Perl.
The problems in the book are interesting and a bit challenging, so I think
it can be worth reading even for people who don’t work with Perl.
About a year ago I made soundlights with Raspberry Pi.
But RPI is a bit of an overkill for this simple task and it’s quite big,
doesn’t have WiFi out of the box and practically can’t be used without a power adapter.
So I decided to port soundlights to ESP8266. The main idea was to reuse as
much as possible from the previous implementation, so the parts with patched
audio visualizer and colors generation are the same. In a few words,
I’ve patched cava to print numbers
instead of showing pretty bars in a terminal. And I’ve generated colors
with a code found on Quora.
And in current implementation I decided to make it very simple to use,
the only requirement is to have a machine with cava and ESP8266
on the same WiFi network. So I chose UDP broadcasting as a way to
send data to ESP8266. And because there’s just 60 LEDs and color of
a LED is three values from 0 to 255, colors for all strip is just
180 bytes. So it fits in one UDP packet.
A few years ago I was using Light Table, the
integration with Clojure REPL was so nice. But the other parts of
the editor and other languages support weren’t that good. And at the
moment the editor looks almost dead.
After that, for Clojure, I switched to Cursive,
and I still use it. It has a nice feature – send to REPL, which
allows users to execute selected code in REPL. But it’s Clojure/ClojureScript
only and requires some hassle to configure.
Nowadays for some stuff, I use Visual Studio Code.
It doesn’t have a nice integration with REPL, but it has integrated terminal.
So I thought, wouldn’t it be nice to just open any REPL in a terminal and
somehow send selected code to the REPL. Without any configuration,
even with REPL on a remote server.
So I wrote a little extension – SendToREPL.
In action with Python REPL:
How does it work? Let’s look at the initial version of the extension:
It just creates a terminal when extension loaded and registers extension.sendToREPL
command. When the command is triggered (by Ctrl+’/Cmd+’ hotkey or from Quick Open)
it gets selected code and sends it to the terminal.
The current version is a bit more advanced, it sends the line with cursor if
nothing selected and squash code in one line for some languages e.g. Perl.
Recently I wanted to read something
about refactoring and about working with not so good code, so I
decided to read Working Effectively with Legacy Code by Michael Feathers.
And it seems to be a good book, it contains a lot of recipes and
techniques for making the code more testable, for removing dependencies
and for making the code better generally.
Although the book is a bit too OOPish and a bit old, I think it’s
still useful.
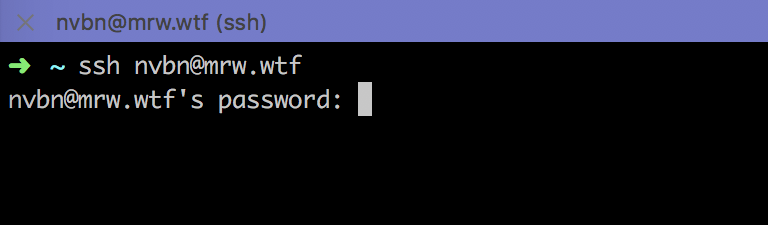
So I thought that it will be nice to distinguish different ssh
hosts by color. I found on
Stack Overflow
how to generate color from a string and wrote a python script that
extracts host from command line arguments and prints fancy sequences:
 Recently I wanted to read something
about Graphite and monitoring in general, as I sometimes need to interact with it.
And I’ve found Monitoring with Graphite by Jason Dixon
and read it. It’s kind of a nice book with history, explanation of the architecture and use cases
of Graphite. It’s not that long and easy to read.
Recently I wanted to read something
about Graphite and monitoring in general, as I sometimes need to interact with it.
And I’ve found Monitoring with Graphite by Jason Dixon
and read it. It’s kind of a nice book with history, explanation of the architecture and use cases
of Graphite. It’s not that long and easy to read. Around a month ago I’ve started working with Hadoop,
so I decided that I need to read something about it, and chose
Around a month ago I’ve started working with Hadoop,
so I decided that I need to read something about it, and chose
 As I sometimes use Perl, I decided
to read something about it. And
As I sometimes use Perl, I decided
to read something about it. And 
 Recently I wanted to read something
about refactoring and about working with not so good code, so I
decided to read
Recently I wanted to read something
about refactoring and about working with not so good code, so I
decided to read